Friday, February 28, 2014
Wednesday, March 2, 2011


Tuesday, January 4, 2011
Assignment 2 :Final Calendar Artwork
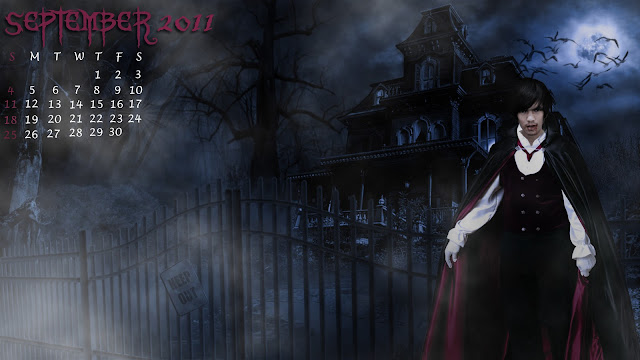
This are my two final artworks for the calendar.The first is the angel for assignment 2, For thia task, my group decided to use Angel and Demon as the main theme.
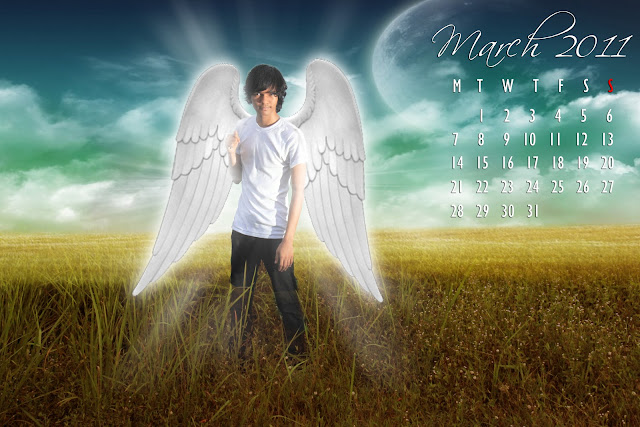

ANGEL THEME

DEMON THEME
Saturday, January 1, 2011
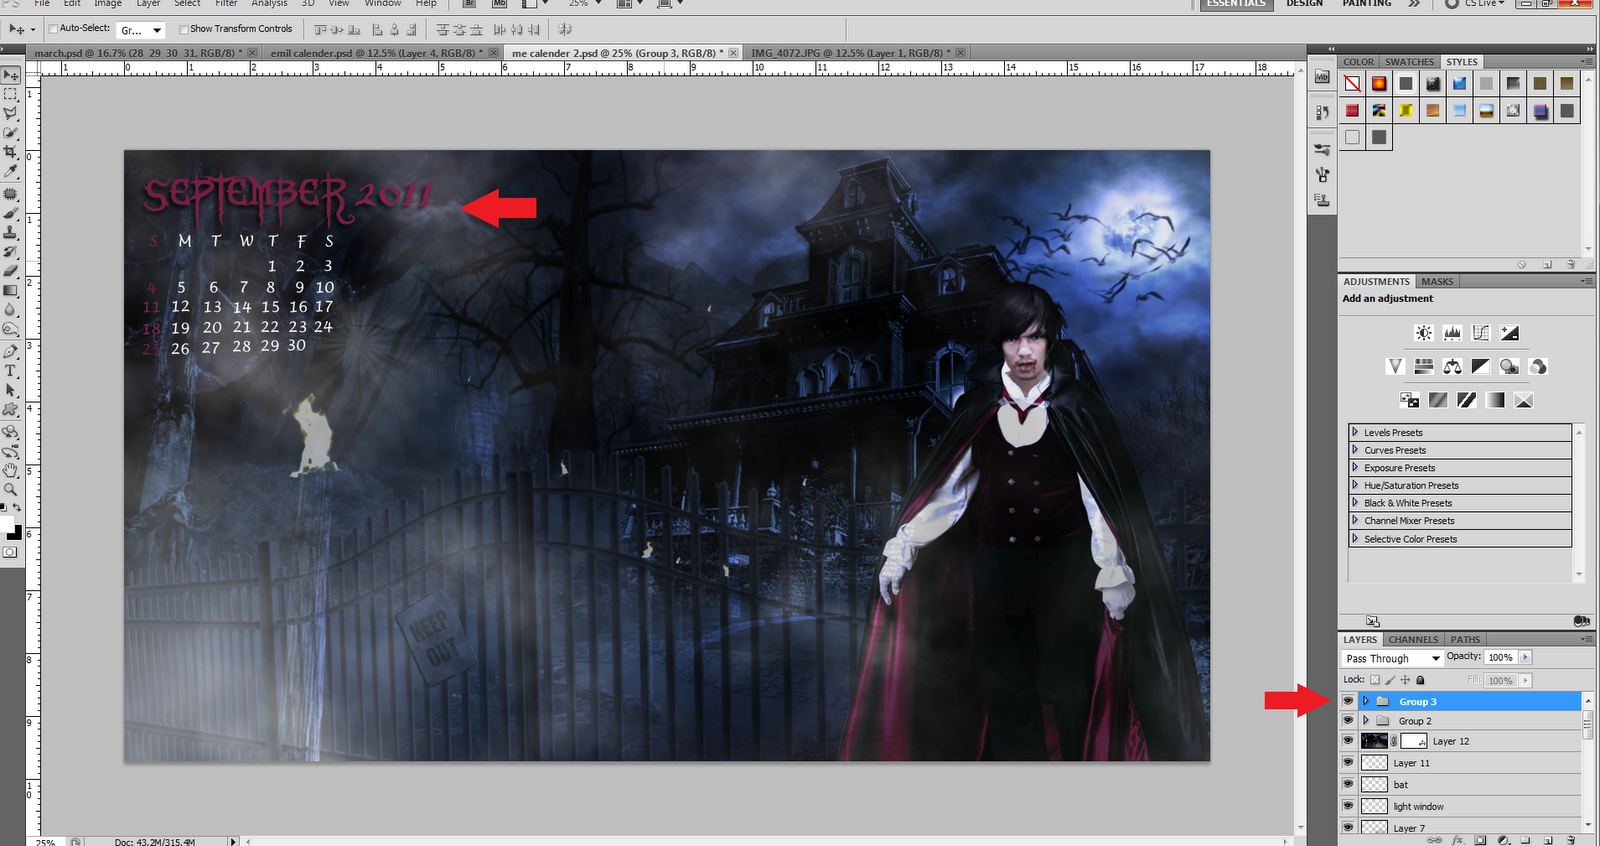
Assignment 2 : Calendar Demon Editing Part 2

Next, I imposed a swarm of bats on the edited image.

Using the same brush of white I brighten the areas I think should be shine a little.

Here I imposed another image to the existing image and reduced the opacity to 16%. Also, I changed the blemding option.

Half way there, I placed the dates of the calendar using Text Tool. and using Grid as a guide to align it.
Friday, December 31, 2010
Assignment 2 : Calendar Demon Editing

I import the new image into the artboard.

next, by using Quck Selection Tool, I imposed my photo into the background which I'll work on a few seconds.

After placing my photo, I erased the bits of part I don't want to use, by using the Eraser Tool.

Afterwards, using the same Selection Tool, I imposed the dracula robe to my body and erase the parts I don't want to use.

Using Colour Filter, I used dark blue to ehance the eerie atmosphere.

Next, using the Hue and Saturation and Black and White filter to brighten my skin color to give myself a more dracula-ish look.

I used the Brush Tool to make blood spiling out from my mouth.


I added smoke effect using FIlter > Render > Clouds and reduce opacity.

Using Brush Tool, I darken the background black while selecting Mulltiply from the Blending Tool.

The same step of darkening the background was done again here.

Finally, a brush of white with a radial blur was used to create an effect of lighting.
Thursday, December 30, 2010
Assignment 2 : Calendar Editing

Firstly. I open the original image then I duolicate ( CTRL J ) so to avoid the original image from faukty work. The following are the steps I used for this image :
-Level ( CTRL L )
-Filter > Sharpen > Smart Sharpen Tool
-Hue and Saturation ( CTRL U )

Next, using the Quick Selection Tool and refine edge. I selected myself to impose on the new background

I placed the background to a new layer, and place myself on the new background.

By using Coloe Balance, i changed the original colour of the grass to yellowish to blend with the new background.

I decided to add a light effect behind me to enhance the atmosphere of the angel themed-image

Now, I selected the wings by using the Quick Selection Tool and paste it on a new layer. Afterwards, i matched the white of the wings to my shirt to avoid awkwardness.

For the last step, I added the dates and the name of the month by using font, SAFFRON. Next, i click on blending option and choosed drop shadow to pop out the words from the background.
Subscribe to:
Posts (Atom)
