Friday, February 28, 2014

Wednesday, March 2, 2011


Tuesday, January 4, 2011
Assignment 2 :Final Calendar Artwork
This are my two final artworks for the calendar.The first is the angel for assignment 2, For thia task, my group decided to use Angel and Demon as the main theme.


ANGEL THEME

DEMON THEME
Saturday, January 1, 2011
Assignment 2 : Calendar Demon Editing Part 2

Next, I imposed a swarm of bats on the edited image.

Using the same brush of white I brighten the areas I think should be shine a little.

Here I imposed another image to the existing image and reduced the opacity to 16%. Also, I changed the blemding option.

Half way there, I placed the dates of the calendar using Text Tool. and using Grid as a guide to align it.

Friday, December 31, 2010
Assignment 2 : Calendar Demon Editing

I import the new image into the artboard.

next, by using Quck Selection Tool, I imposed my photo into the background which I'll work on a few seconds.
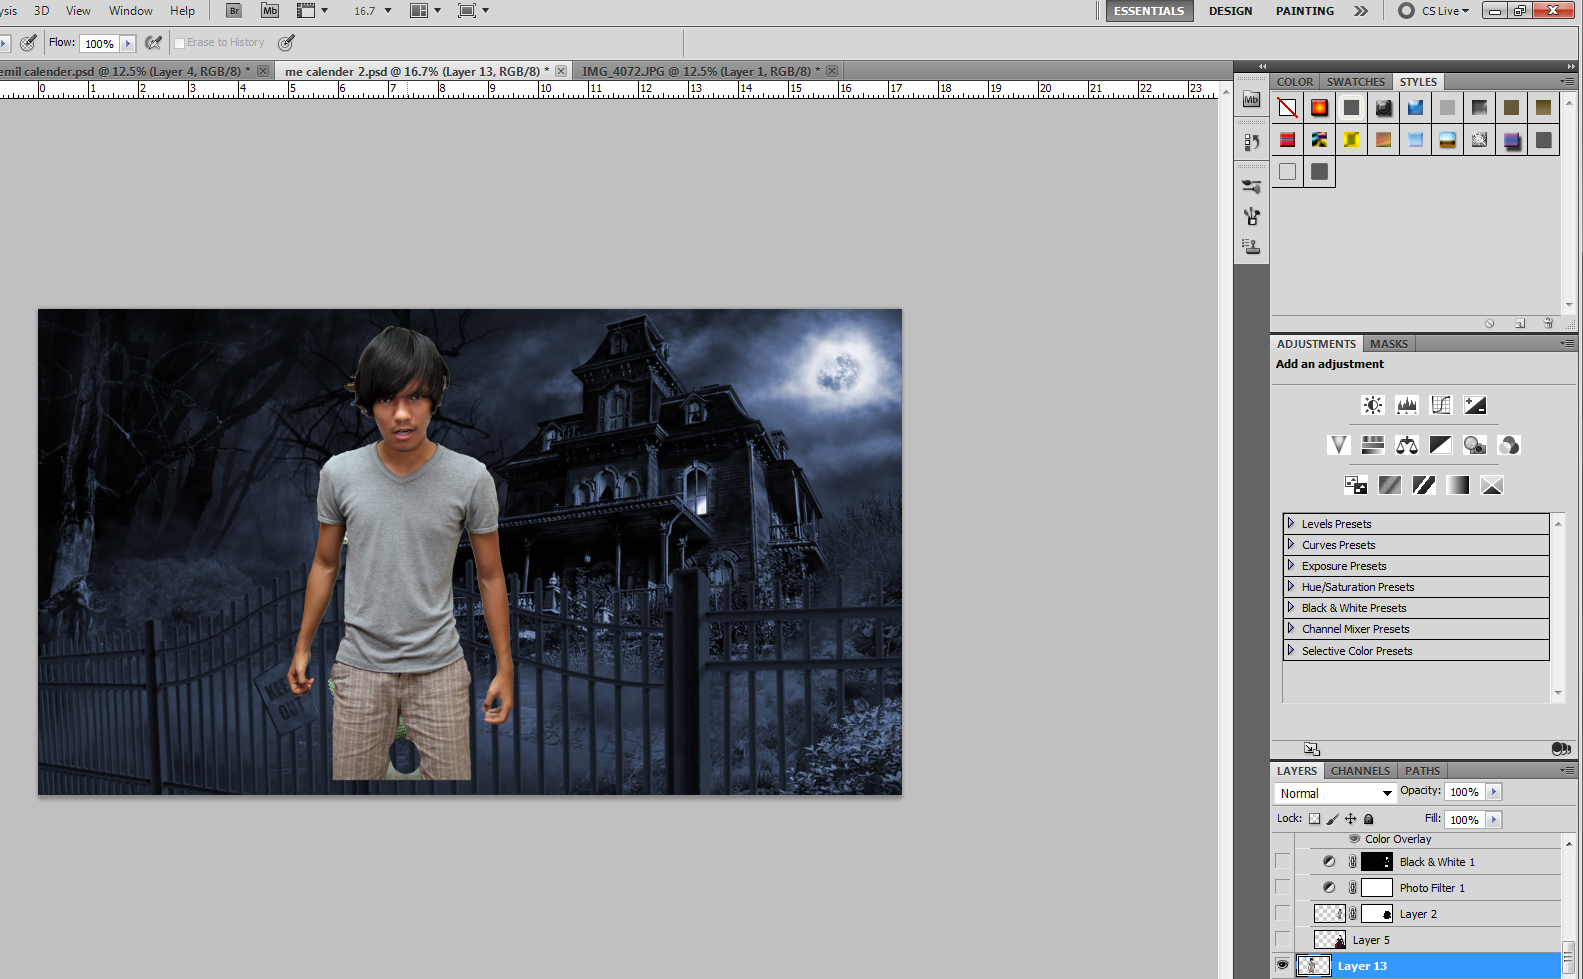
After placing my photo, I erased the bits of part I don't want to use, by using the Eraser Tool.

Afterwards, using the same Selection Tool, I imposed the dracula robe to my body and erase the parts I don't want to use.

Using Colour Filter, I used dark blue to ehance the eerie atmosphere.

Next, using the Hue and Saturation and Black and White filter to brighten my skin color to give myself a more dracula-ish look.

I used the Brush Tool to make blood spiling out from my mouth.


I added smoke effect using FIlter > Render > Clouds and reduce opacity.

Using Brush Tool, I darken the background black while selecting Mulltiply from the Blending Tool.
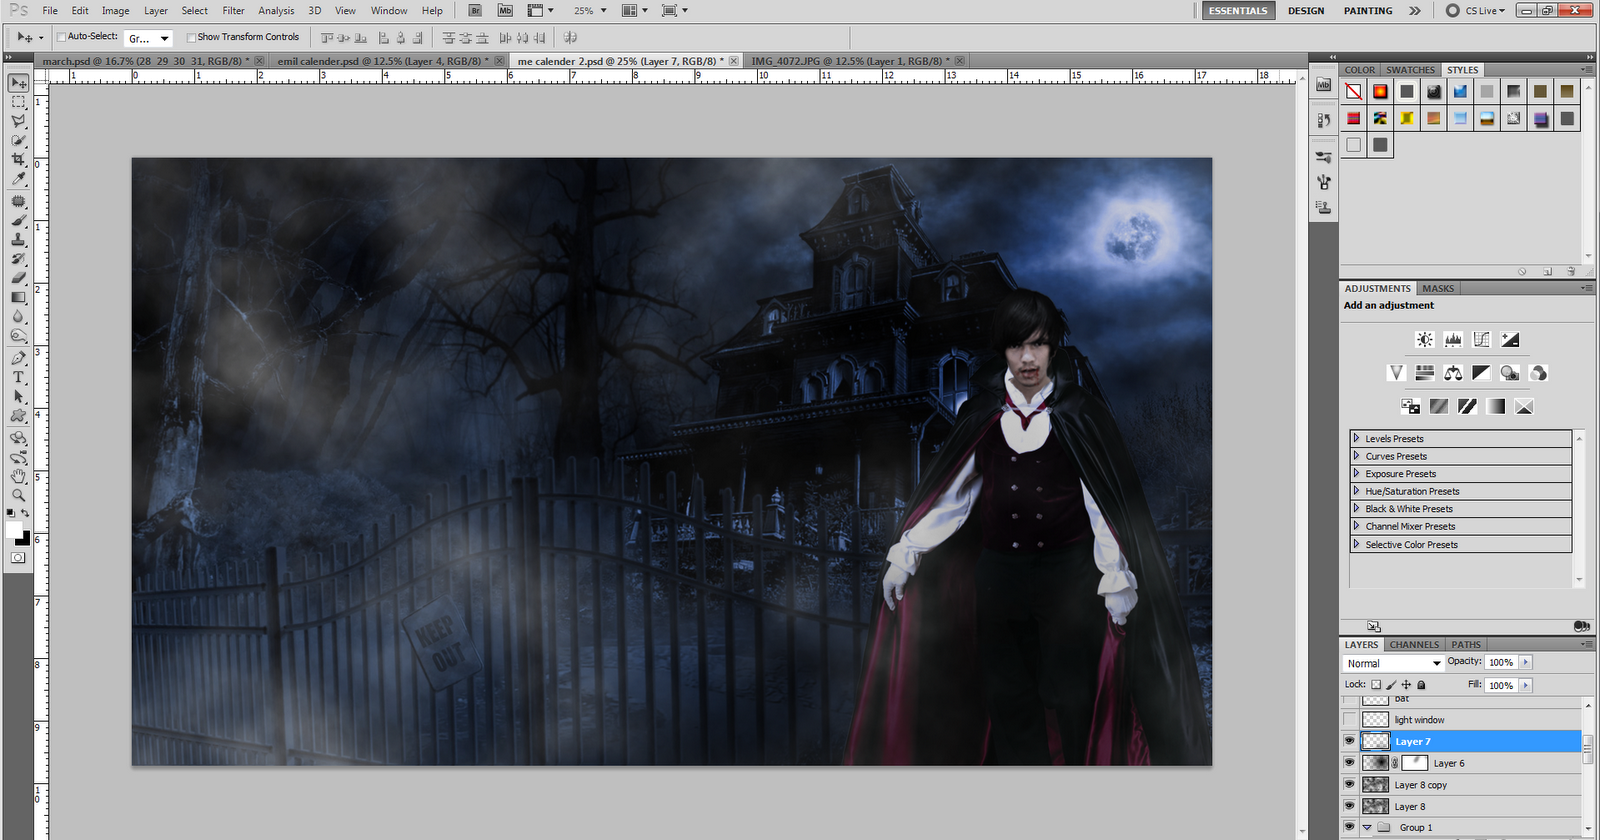
The same step of darkening the background was done again here.

Finally, a brush of white with a radial blur was used to create an effect of lighting.
Thursday, December 30, 2010
Assignment 2 : Calendar Editing

Firstly. I open the original image then I duolicate ( CTRL J ) so to avoid the original image from faukty work. The following are the steps I used for this image :
-Level ( CTRL L )
-Filter > Sharpen > Smart Sharpen Tool
-Hue and Saturation ( CTRL U )

Next, using the Quick Selection Tool and refine edge. I selected myself to impose on the new background

I placed the background to a new layer, and place myself on the new background.

By using Coloe Balance, i changed the original colour of the grass to yellowish to blend with the new background.

I decided to add a light effect behind me to enhance the atmosphere of the angel themed-image

Now, I selected the wings by using the Quick Selection Tool and paste it on a new layer. Afterwards, i matched the white of the wings to my shirt to avoid awkwardness.

For the last step, I added the dates and the name of the month by using font, SAFFRON. Next, i click on blending option and choosed drop shadow to pop out the words from the background.
Sunday, December 26, 2010
Exercise 2

Adjustment / Retouch
- Vibrance
- Brightness and Contrast
- Curve
- Level
- Hue / Saturation
- Healing Brush Tool
Selection
- Quick Selection Tool
- Magnetic Selection Tool
Vector
- Using Pen Tool to make some object
- Using pen Tool to add and subtract selection
Typography
- Arrange letter
Masking
- Create Clipping Mask
- Add Layer Mask
Effect
- Sharpen
- Gaussian Blur
- Change Layer Mode to (Multiply, Hard Light, Soft Light, Luminosity, etc)
-Vanishing point
Friday, November 19, 2010
This is my step of working on the e-wallpaper as my assignment 1 for computer graphics.
 |
| First,i open the file and go to the new image(Ctrl+N).For this e-wallpaper,i was used A4 size and 72ppi.Next,i click on new layer and fill it with black colour(New layer>edit>fill>fill with black color). |
 |
| Secondly,i used the images that shown above and move on the top of it to the work space that have been filled with black.I used layer mask to remove unwanted things on this photo. |
 |
| Next,i used quick selection tool,to select part of the image that i want and place it nicely on the workspace. |
 |
| Next,i repeat the step above on this image.I used another image to place on the workspace and place it nicely,to move the picture around you just need to press (Ctrl+T) either to move the picture or to resize it.Next,i used layer mask to remove the unwanted things on the images that i've been placed. |

 |
| After that,i used another image to place on the workspace and place it nicely,to move the picture around you just need to press (Ctrl+T) either to move the picture or to resize it.Next,i used layer mask to remove the unwanted things on the images that i've been placed. |
 |
| After that,i used the text tool(T) to make the tittle of my wallpaper,i type on LOY KRATONG FESTIVAL and A FESTIVAL NOT TO BE MISSED.Next,i merge down the two text and i go to blending option to change the colour and put some gradient on the tittle. |
 |
| I've used brush to make these flower and combine it to the text. |
 |
| Lastly,i've used curve to adjust the colour of my wallpaper,and give the nice color balance on your photo. |
Thursday, November 18, 2010

Thursday, November 4, 2010
Loy Krathong Festival (A Festival Not to Be Missed)
This festival, falls in the 'not to be missed category and if you believe in luck, joining in, is a 'must do'. It's also one of those celebrations that children absolutely adore and will certainly be one of their fondest memories of their visit to this part of the world
If you happen to be holidaying in Phuket, one of the more popular festival venues, when this enchanting festival occurs, you might just have a better chance of a luck filled future.Phuket's west coast beaches generally have an off-shore breeze blowing at this time of year, which will help give your wishes a boost. How good your fortune will be, is up to you and the tides or currents during the festivities. There is one simple way to ensure that at least a little of the festival's blessing comes your way, however


If you happen to be holidaying in Phuket, one of the more popular festival venues, when this enchanting festival occurs, you might just have a better chance of a luck filled future.Phuket's west coast beaches generally have an off-shore breeze blowing at this time of year, which will help give your wishes a boost. How good your fortune will be, is up to you and the tides or currents during the festivities. There is one simple way to ensure that at least a little of the festival's blessing comes your way, however


Subscribe to:
Posts (Atom)

